
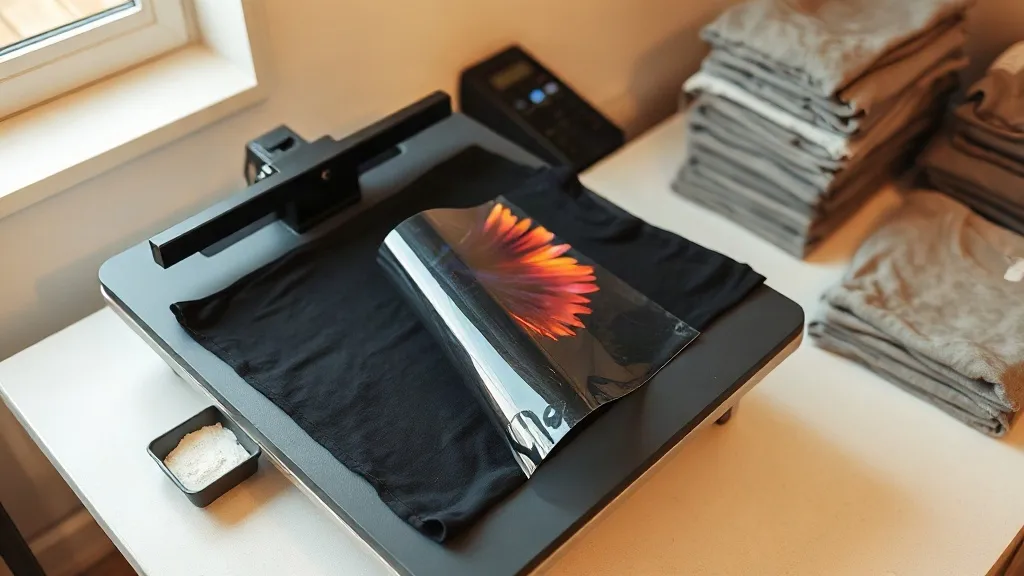
Most print shops learn about dtf transfers the same way: someone brings in a ten-piece order with a full-color design, no color separations, and a deadline of Friday. Screen printing would eat the setup budget. Vinyl would take an afternoon of weeding. So you try DTF, and if the press is dialed in, the shirts come out looking sharp. If it isn't, you get cracked edges, dull color, or a plastic hand feel that customers notice immediately. The difference between those two outcomes is rarely the film itself. It's the handful of variables nobody explains in the sales pitch.
This guide is written from the perspective of someone who has pulled a lot of transfers off a heat press, ruined a few, and figured out why. It covers what DTF actually is, where it outperforms other decoration methods, how to prepare artwork that prints well, which fabrics and blanks pair best with it, and how to troubleshoot the failures that show up most often. If you run a small shop, a side business, or a school program printing spirit wear, these are the details that keep reorders coming.
What DTF Actually Is, and Why Shops Keep Choosing It
Direct-to-film printing works by printing a design onto a special PET film, dusting it with a hot-melt adhesive powder while the ink is still wet, then curing the powder so it becomes a transferable layer. To apply it, you press the film onto a garment, peel it, and the design bonds to the fabric. The adhesive powder is the part that does the real work. It's what lets the print survive washes, stretch, and the occasional accidental tumble dry.
The reason dtf has spread so fast among small and mid-size shops comes down to economics and flexibility. There's no screen setup, so a one-off shirt costs roughly the same per unit as the twentieth shirt in a run. Full-color gradients, photographic images, and fine details all print in a single pass. You can stock a roll of film and a roll of powder instead of a wall of plastisol buckets. For shops that take on mixed orders, like a team jersey set with twelve different names and numbers, that flexibility is worth more than the per-unit savings of screen printing.
Where it beats other methods
Screen printing still wins on large runs of simple designs, and it always will. But DTF has clear advantages in specific situations:
- Short runs and one-offs where setup costs would otherwise dominate the price.
- Designs with photographic detail, soft gradients, or many colors.
- Personalized items like names, numbers, and small logos added to stock garments.
- Orders that need to ship quickly without a production queue.
Where it still struggles
Honesty matters here. DTF prints sit on top of the fabric rather than soaking into it, so on very lightweight or highly textured materials the hand feel is noticeable. It also performs poorly on fabrics that can't take heat, like some nylons and certain synthetic blends. And while modern films and powders have improved dramatically, a poorly cured transfer will still crack. Knowing these limits up front saves you from promising something the process can't deliver.
Getting the Artwork Right Before You Print
Most DTF problems start in the design file, not at the press. A few habits will save you a lot of wasted film.
First, keep your file at 300 DPI at final print size. Upscaling a low-resolution logo to fill a shirt back produces a soft, fuzzy edge that no amount of pressing will fix. Second, add a small white underbase margin around the design. The white ink layer is what gives DTF its opacity on dark garments, and if the white doesn't extend slightly past the color, you'll see a thin halo of fabric around the edges. Third, avoid hairline strokes below about 0.5 mm. Very thin lines can break up during transfer, especially on stretchy fabric.
One more thing worth doing: print a test on scrap fabric before committing a full order. A design that looks perfect on screen can reveal unexpected issues in the white layer or color density, and catching that on one test piece is far cheaper than catching it on thirty finished shirts.
Pressing Settings That Actually Work
Every film and powder combination has slightly different ideal settings, so treat any numbers as a starting point and adjust from there. That said, these ranges work well for most standard DTF setups:
- Temperature: 300 to 320 degrees Fahrenheit for most cotton and cotton-blend garments.
- Pressure: medium to firm, enough that you can see the fabric texture through the film.
- Pre-press: 5 to 10 seconds to remove moisture from the garment.
- Press time: 10 to 15 seconds for the transfer itself.
- Peel: hot peel for most films, though some require a cool peel. Check your supplier's spec sheet.
Two variables get overlooked constantly. The first is moisture. Cotton holds ambient humidity, and a damp shirt will cause the adhesive powder to cure poorly, leading to premature cracking. A quick pre-press solves it. The second is pressure consistency. A press with uneven platens will produce transfers that look fine in the center and fail at the edges. If you notice edge lifting on multiple jobs, check your press before blaming the film.
The second press matters more than people think
After peeling the film, a short second press through a protective sheet or parchment improves durability noticeably. It re-melts the adhesive into the fabric fibers and smooths the surface. Ten seconds is usually enough. Skipping this step is one of the most common reasons a print feels rough or starts to lift after a few washes.
Choosing Blanks: Why Fabric Matters
The garment you press onto is half the equation. Smooth, tightly knit cotton takes DTF beautifully. Open-knit or heavily textured fabrics let the print sit unevenly, and the adhesive can't bond as thoroughly to the peaks and valleys of the surface.
For shops that want reliable results across a range of styles, shaka wear blanks are a practical choice. The brand's heavyweight cotton tees and fleece have a dense, consistent weave that holds a transfer cleanly, and the heavier fabric weight means the print doesn't distort when the garment stretches. Lighter blanks can work too, but you'll want to reduce pressure slightly and watch for the print telegraphing the fabric texture through the design.
Blends are a mixed bag. A 50/50 cotton-polyester shirt will accept a transfer, but the polyester content can cause the print to sit differently, and some poly fabrics are sensitive to higher press temperatures. Always test a blend before running a full order on it.
Troubleshooting the Most Common Failures
When a transfer goes wrong, the cause is usually one of four things. Here's how to diagnose each.
Cracking after washing
Almost always a curing or pressure problem. The adhesive powder wasn't fully melted, or the second press was skipped. Increase press time slightly, verify your temperature with an infrared thermometer rather than trusting the dial, and make sure you're doing that finishing press.
Dull or washed-out color
Usually a sign of insufficient pressure or a worn press pad. Without firm, even pressure, the ink layer doesn't fully transfer from the film, leaving a thin, weak print. Check your platen padding and increase pressure gradually until the color looks solid.
Edges lifting or peeling
Often caused by moisture in the garment or by pressing over seams and thick hems. Pre-press the shirt, and use a pressing pillow when working near collars, pockets, and side seams so the print surface stays flat.
Stiff, plastic hand feel
This is partly inherent to DTF, but you can reduce it. Use a thinner white underbase where possible, avoid stacking multiple layers, and consider a matte-finish film if your supplier offers one. On heavyweight cotton the feel is much less noticeable than on thin, stretchy fabric.
Making DTF Work as a Business
The shops that do well with DTF treat it as a system rather than a shortcut. They keep a small inventory of film and powder, standardize their press settings for each blank they regularly use, and log which combinations work. That log becomes genuinely valuable over time, because it turns guesswork into repeatable process.
Pricing deserves attention too. Because there's no setup cost, it's tempting to price DTF jobs low. But film, powder, labor, and the occasional failed print all add up. Build a per-unit cost that includes a realistic waste factor, and price from there. Shops that underprice DTF tend to discover the problem three months in, when the margins don't cover the reprints.
Finally, set expectations with customers. Tell them how to wash the garment: inside out, cold water, no fabric softener, tumble low or hang dry. A print that's properly made and properly cared for will last a long time. A print that's properly made and washed on hot with softener will fail, and the customer will blame the print.
Frequently Asked Questions
Can DTF transfers be applied to 100% polyester shirts?
Yes, but with caution. Polyester is heat-sensitive, so you'll typically need a lower press temperature, often around 280 to 300 degrees Fahrenheit, and a shorter dwell time. Always test on a scrap piece first, because some poly fabrics can scorch or develop a sheen under too much heat.
How many washes should a DTF print survive?
A properly cured and pressed transfer on a suitable fabric generally holds up for dozens of washes when cared for correctly. The variables that shorten that lifespan are hot water, high dryer heat, fabric softener, and skipping the finishing press during production.
Do I need a special printer to make DTF transfers?
You need a printer that uses DTF-specific pigment inks and a white ink channel, plus a powder shaker and a curing oven or heat press for the powder. Many shops skip the equipment entirely and buy pre-printed transfers from a supplier, which is a sensible starting point before investing in production gear.
What's the difference between DTF and DTG printing?
DTG prints directly onto the garment, which limits it mainly to cotton and requires the shirt to be loaded onto the printer. DTF prints onto film first, then transfers to the garment, which opens up polyester, blends, and hard-to-print items. DTF also tends to have a more consistent white on dark fabrics.
How should I store unused transfers?
Keep them flat, dry, and away from direct heat and sunlight. Moisture is the main enemy, so a sealed bag with a desiccant pack works well for longer storage. Transfers stored properly typically stay usable for many months, though older film can become brittle and harder to peel cleanly.